Introduction
This guide details the installation procedure of Arch onto a Virtual Machine (VM). Network configuration is not in the scope of this guide if you are installing on bare metal.
The motivation behind this web page is to keep some guidance material for myself and also for anybody new looking to install Arch from scratch.
The virtual machine is made with Microsoft’s Hyper-V program. The steps may differ slightly if you choose to use a another hypervisor such as VirtualBox.
Video Tutorial
This video tutorial will closely follow the installation process described in this article:
Arch Linux ISO Download Link
You can find the download link to the Arch Linux ISO here: https://archlinux.org/download/
The recommended way to pull down the ISO file is by torrenting it from the referenced magnet link.
When the download is complete, you can configure your virtual machine.
Creating a Hyper-V Virtual Machine
1. Create New Virtual Machine
The first step is to open up Hyper-V and create a new virtual machine

2. Select VM Generation
You will be asked which generation of VM to create. I would reccommend to select “Generation 2”. It supports UEFI firmware and it should be better from a cyber-security standpoint.

3. Allocate Memory
You can specify how much memory to allocate to the VM. I decided to allocate 4000MB in my use case.

4. Configure Network Adapter
Hyper-V has a built in network adapter that works out of the box, so you’d want to select “Default Switch” to have it enabled.

5. Create Virtual Hard Disk
For the VM you should create a virtual hard disk to store the data. I decided to allocate 30GB of storage space.

6. Select .iso Image
You need to select the arch linux ISO file to boot from and then you can finalise the VM creation.

7. Go to Settings
We are not done yet, we still need to configure 2 more things in the settings panel of this VM we just created.

8. Disable Secure Boot
We need to disable Secure Boot, if you do not do this step, it will interfere with your ability to boot the ISO image.

9. Change Boot Priority
Next we need to bump the Hard Drive to the first priority of boot loading. Its very important that you do this step before you start installing linux otherwise the Grub will fail down the line because it will be trying to boot from the DVD Drive. You will not be able to retroactively change the boot order at a later stage.
 After applying the changes:
10. Fixing Hyper-V Resolution (Powershell)
Oddly enough we do not have GUI setting for adjusting the resolution of the VM which is bizzare for a windows tool. Therefore we will need to use Powershell (with Admin permissions) to fix this.
In powershell you can run the following command to set the maximum resolution of the VM (Please replace the respective VMName in quotations with the VM you just created.):
Set-VMVideo -VMName 'ArchVM' -HorizontalResolution 1920 -VerticalResolution 1080 -ResolutionType Single
11. Start the VM
Connect to the VM:
 Start the VM:

Installing Arch Linux
From this screen select the highlighted option to load the ISO image

The install process starts here:

1. Verify Internet Connection
Before going any further, you should ping a website to test your internet connection:
ping archlinux.org
 The Hyper-V default network switch should automatically provide your VM with the internet connection. If not, you will probably need to configure Hyper-V to alleviate networking issues.
2. Synchronise System Clock
We also need to synchronise the systems clock with the network time:
timedatectl set-ntp true
3. Drive Partitioning
Now we need to start partitioning our drives and creating our file system.
The lsblk command indicates which drives and partitions are on your system. And we can use cfdisk to partition the drives.

Type the command to start partitioning your virtualised disk:
cfdisk /dev/sda

At this juncture we need to assign the disk label type and it comes down to two options mainly:
- If the hardware is new and the drive >= 2TB, use gpt.
- Otherwise use dos.
For our scenario we are using dos
Decide on a partition scheme. I will keep it simple and reduce it to a boot and root partition:
- /dev/sda1 (boot partition) only needs about 128MB of space and needs to be bootable. You can press b to enable the boot flag after making the partition.
- /dev/sda2 (root partition) can be assigned the remaining space of the disk.
Write the changes and quit out of cfdisk.
 If you lsblk now, you will now see that 2 partitions have been made which are called sda1 and sda2.
4. Creating File Systems
We also need to make the file systems for each partition:
- sda1 (boot) is FAT32 file system.
- sda2 (root) is ext4 file system.
Run these commands to create the file systems respectively:
mkfs.fat -F 32 /dev/sda1
mkfs.ext4 /dev/sda2
5. Mounting the File Systems
Now the mounting procedure MUST go in a specific order:
- sda2 (root) is mounted first to /mnt
- sda1 (boot) is mounted last to /mnt/boot/efi
mount /dev/sda2 /mnt
Warning: If you mount in reverse order, the install will fail!
For the boot partition, you will need to make a directory with this path /mnt/boot/efi:
cd /mnt
mkdir boot
cd /mnt/boot
mkdir efi
Since we have a UEFI system config, we need this extra efi directory (normally we do not). Now we can mount the filesystem for boot:
mount /dev/sda1 /mnt/boot/efi
6. Installing Essential Packages
At this stage, you are ready install the base tools for the system in addition to the Linux kernel.
Use the pacstrap command to install the following tools to /mnt:
pacstrap /mnt base base-devel linux linux-firmware vim
7. Generate fstab Configuration
Run the following command to generate your fstab configuration:
genfstab -U /mnt >> /mnt/etc/fstab
genfstab -U /mnt
8. Chroot
Change root into new system by running this command:
arch-chroot /mnt /bin/bash
9. Install Key Packages
Pacman is our package manager and we can use it to install some key packages:
- networkmanager - Detection and configuration of systems to connect to networks
- grub - Bootloader for the computer
- efibootmgr - Package dependency for grub’s installation command
pacman -S networkmanager grub efibootmgr
10. Auto-enable Internet on Startup
We can use systemctl to enable network manager as a service which starts automatically when you boot the computer (which is very useful to have).
systemctl enable NetworkManager
11. Install and Configure Grub
Next we run the grub-install command on /dev/sda; it should run with no errors:
grub-install /dev/sda
We need to make a config file for grub, with the following command:
grub-mkconfig -o /boot/grub/grub.cfg
We need to edit this grub file:
vim /etc/default/grub
Uncomment the line “GRUB_DISABLE_OS_PROBER=false” and then save the file.

You may also want to edit the following grub variables if you wish to change the resolution of grub:
- GRUB_CMD_LINUX_DEFAULT
- GRUB_GFXMODE
GRUB_CMD_LINUX_DEFAULT="quiet splash video=hyperv_fb:1920x1080"
GRUB_GFXMODE=1920x1080
Note: The video parameter may be different if you are doing this bare metal or are using another VM software.
Save and exit from the grub file.
Now you will need to enact those changes onto the grub.cfg file which is read at boot time. So you will need to run the following command:
grub-mkconfig -o /boot/grub/grub.cfg
After rebooting your Linux machine, your terminal should automatically scale to the 1080p resolution without having to make changes using commands like xrandr -s 1920x1080 inside the display server.
12. Set Root Password
Run the passwd command to set a root password for the machine

13. Localization
Edit /etc/locale.gen to change the language settings of the machine.
vim /etc/locale.gen
Uncomment the lines that apply to your language of choice.
 Run locale-gen command to generate the locales you have selected:
locale-gen
Edit /etc/locale.conf and set the language being used:
vim /etc/locale.conf
Enter the LANG variable into the file with the relevant language setting:
LANG=en_GB.UTF-8
14. Hostname
Edit /etc/hostname:
vim /etc/hostname
The word you type in here will be the name of your computer. I decided to call mine arch. But it can be anything you want. Save and close the file.
15. Timezone
You can set the time zone with the following command:
ln -sf /usr/share/zoneinfo/Greenwich /etc/localtime
Greenwich can be substituted for any region within that zoneinfo directory.
15. Rebooting
We are ready to reboot the system. First we need to exit the root environment and to unmount all the partitions. Then we can reboot.
exit
umount -R /mnt
reboot
Bonus - 16. Booting From Grub Shell
In case you forgot to set up your genfstab to automatically mount your drive in the boot process. You still can boot into Arch using the Grub shell and fix any steps that were missed:
# List out drives and partitions
ls -l

# Set root var to root partition
set root=(hd0,msdos2)

# Load linux kernal
linux /boot/vmlinuz-linux root=/dev/sda2 rw

# Load the initramfs
initrd /boot/initramfs-linux.img

# Boot into system
boot
If successful you should be greeted with this screen. You can select Arch Linux to boot into the system.
 And you should see a tty appear on your screen.
We do not have any users set up on the system (yet).
Simply login as the root user. The root password is what you set earlier in the setup process.
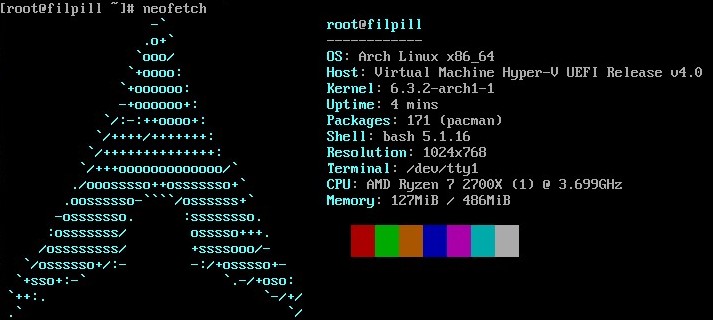
 That’s about it, you now have a base install of Arch Linux.
From this point you are free to customise your desktop to your liking.