
Introduction
After installing a fresh copy of Arch Linux, you are probably wanting to get around to setting up some type of graphical environment.
It can be difficult to setup a graphical environment for the first time if there is not much guidance. Linux advice can be very scattershot, and can leave people feeling quite lost. You will end up digging through heaps of internet archives just to surface something vaguely relevant to your own setup.
This article should guide you on creating a basic graphical setup for your Linux machine relatively quickly and with ease.
Note: Depending on your own software and hardware, you may need to deviate from these prescribed procedures from time to time. Read the documentation for the programs you use and adjust accordingly.
I will prescribe the software choices in this article, however, once you feel comfortable, you can choose to go in your own direction.
I setting up a window manger as the foundation for this guide. My system is running Arch Linux running under Hyper-V.
Creating a User - Getting Sudo Permissions
At this stage, you probably only have a root user on a fresh install, so it would be a good idea to create a user for yourself:
useradd -mg wheel filpill
You want to add yourself to the wheel group as we will make some changes to enable you to have access to the sudo command i.e. allow admin privileges.
Add a password for that your using this command (and follow the prompts):
passwd filpill
Next you will need to edit the sudoers file in order to give the wheel group the relevant access.
You can find the file at /etc/sudoers.d and you will need to uncomment the following line:
%wheel ALL=(ALL) ALL
Now you will be able to execute commands as root after being prompted for a password.
X11 - Display Server
Since we are using a window manager as the graphical environment, we are going to need to have some kind of display server.
Traditionally for Linux, Xorg/X11 is the display server of choice as it has the best compatibility with other software. Alternatively, you have Wayland as a more efficient option, although you may run into compatibility issues depending on what software is running.
In order to maximise compatibility and stability, I will continue to configure using Xorg for the time being until Wayland catches up.
The following programs will need to be installed:
- picom
- xorg
- xorg-server
- xorg-xinit
- xf86-video-fbdev (video driver for Virtual Machine)
If you are installing on bare metal, then you will probably require a different video driver, so just research the one you need depending on the hardware you have.
Using pacman, you can install with is command:
sudo pacman -S picom xorg xorg-server xorg-init xf86-video-fbdev
dwm - Window Manager
Dwm is a Suckless software and will be forming the backbone for the environment we are building.
However, the install procedure and configuration is a little different compared to other programs.
We cannot run a simple pacman command to install it. The program is written in C and needs to be compiled directly from those C files.
You will need to visit the Suckless Website to get the source files and relevant patches.
They have the base version of dwm on git, so you will need to run a git clone command to pull it down onto your machine. Run the git command:
git clone git://git.suckless.org/dwm
If you need to change the configuration, you can do all the changes inside the file **config.h".
To compile the dwm configuration:
sudo make clean install
It’s fairly straightforward, if no errors occur, you have successfully installed dwm.
However, if you ever need to change the config, you will need to re-compile those C-files.
It would also be advisable to host a copy of your own dwm configuration on your own git repository so that you are able to deploy onto any machine very easily.
st - Terminal Emulator
There are many terminal emulators you can use as an option to supplement dwm.
However, for continuity I would go for st which is also a Suckless utility and follows a similar procedure.
Clone from the suckless website:
git clone git://git.suckless.org/st
Configuration changes occur in the file called config.h.
Compiling st into your desktop is done via this command:
sudo make clean install
Exact same procedure as dwm. Again, you can save the st configuration onto your own git repository.
Config Files - .xinitrc and .bash_profile
.xinitrc
Your .xinitrc is where you will:
- Start the terminal compositor as a background process
- Start dwm
After vimming into ~/.xinitrc; add these two lines in:
picom -b
exec dwm
Note: Exec dwm MUST be the last executed command of the xinitrc file
.bash_profile
If you are using bash, this file will be called .bash_profile.
Depending on which shell you are using, the filename may be different. E.g. for zsh, the corresponding file would be called .zprofile
What you need to do in this file is essentially add a command to start the display server. The command for starting the display server is exec startx.
After adding that command, your .bash_profile would look something like this:
#
# ~/.bash_profile
#

[[ -f ~/.bashrc ]] && . ~/.bashrc

[[ $(fgconsole 2>/dev/null) == 1 ]] && exec startx --vt1
After saving your .bash_profile, you should be able to reboot your system.
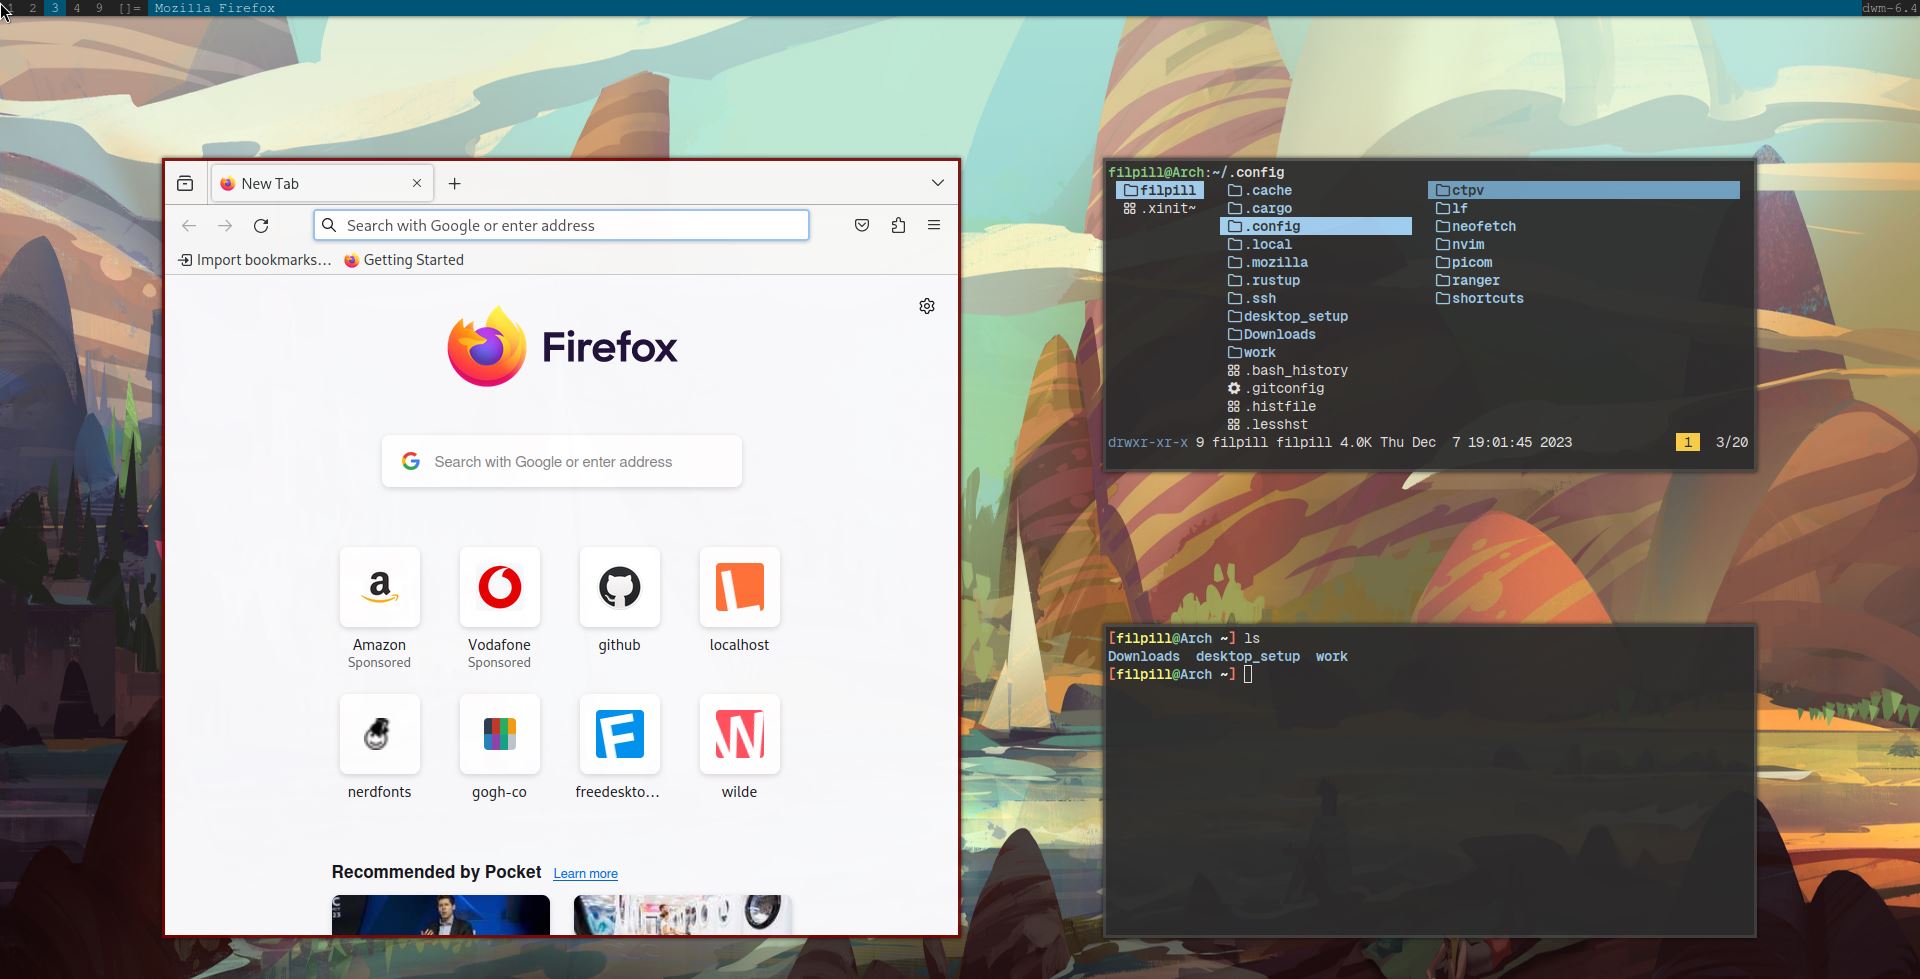
The next time you login into your user profile, it should execute the commands in both ~/.bash_profile and ~/.xinitrc in order to start the display server and start dwm.
Now you should have dwm automatically loaded in and you should be able to spawn st terminal’s inside dwm.
lf - Terminal File Explorer
The file explorer I recommend using is called lf. It’s handy for exploring the terminal more efficiently. Also very useful for bulk operations.
You can install using pacman:
sudo pacman -S lf
To open lf, simply type: lf into your terminal window.
Extending lf
I also recommend extending this program to get some more functionality from it by:
- Adding icons to the file explorer
- Adding previews for text, images and pdf’s
Icons - lf
In order to get the icons to work for the lf configuration, you will need two things:
- Create an icons file in the lf config
- Install a “nerdfont”
You can make the icons file inside ~/.config/lf with:
touch ~/.config/lf/icons
Go to the Gokcehan - lf git repo - icons.example, copy the entire contents and paste directly into your newly created icons file.
You will notice that you terminal is unable to read the iconography. This is solved by installing a “nerdfont”.
Go to Nerd Fonts Website and download any font of your choosing.
Unzip the downloaded font and paste the contents into ~/.local/share/fonts.
In order for st to change the font being used, you must edit the config.h of st.
There should be a line in config.h which defines the font name, simply edit the line with the new name. For example my st font is configured like this:
static char *font = "GeistMonoNerdFont-Medium:pixelsize=14:antialias=true:autohint=true";
Run sudo make clean install to re-compile st and you should now be able to read those characters in the icons file.
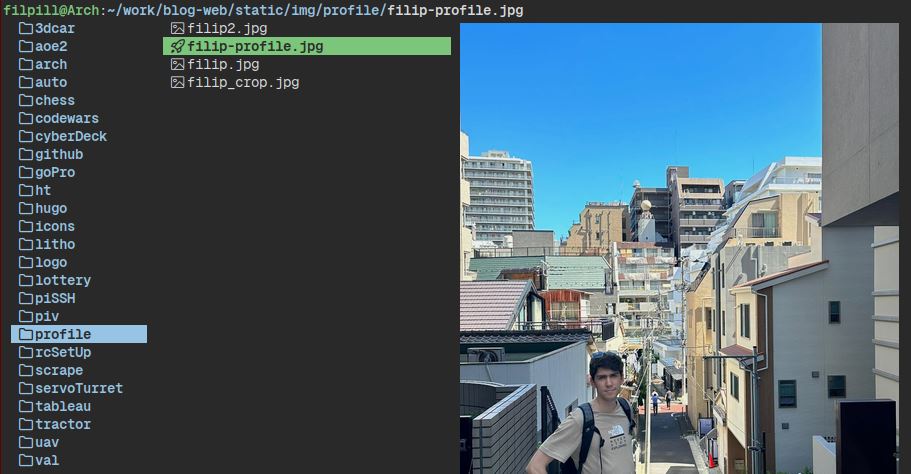
The next time you run lf on a fresh instance of st, you should be able to see icons of the various files in your system.
![]()
It should feel much easier to navigate more easily!
As a quick tip, you can press zh when inside lf to toggle visibility of hidden files. You will likely want to do this if you are searching for dotfiles.
Image Preview - ctpv
ctpv is program made by NikitaIvanovV and is designed to be integrated directly into lf to avoid the use of wrapper scripts.
We will only need to make some minor additions to our lfrc.
To install ctpv, run these commands:
git clone https://github.com/NikitaIvanovV/ctpv
cd ctpv
make
sudo make install
Go to your lfrc located in ~.config/lf/lfrc and add these lines:
set previewer ctpv
set cleaner ctpvclear
&ctpv -s $id
&ctpvquit $id
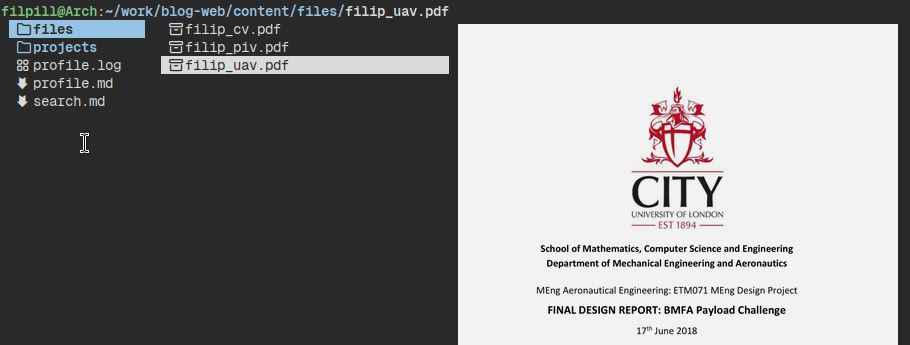
These configuration lines effectively work to bring up the image previews and (clearing in prep for next image).
That’s all you need; the preview should accommodate most file types:
zsh - Changing default Shell
I prefer to use zsh as the default shell as opposed to bash. There are some extra features which can enhance the experience e.g.:
- Better Autocomplete
- Ability to Tab through
- Change directories without typing ‘cd’
This is by no means an exhaustive list. You can configure your shell to have as many or as little features as you want.
You can install zsh using the pacman command:
sudo pacman -S zsh
The first time you run zsh (by typing zsh into the terminal), you will be greeted with CLI configuration menu to perform a first time set up. Once that’s complete, the setup menu will not appear again, it will just launch zsh.
However, if you want to change your default shell from bash to zsh when you login, you will need to run some extra commands.
First you will need to list all the available shells installed on the machine:
chsh -l
After finding the one you wish to use by default, you can type the command:
chsh -s /bin/zsh
You will be prompted for your password and after this stage the default shell is now zsh. The next time you login, it will spawn a zsh shell within st.
Don’t forget to migrate all the configuration you have down in ~/.bash_profile to ~/.zprofile as bash and zsh don’t share the same config files.
Adding Terminal Based Copy-Paste Bindings
This is for enabling the clipboard across any program or instance.
You can add a couple of lines to your neovim config in ~/.config/nvim/init.vim:
"Copy paste to X11 Clipboard
vmap <leader><F6> :!xclip -f -sel clip<CR>
map  <leader><F7> mz:-1r !xclip -o -sel clip<CR>
These key bindings xclip commands allow terminal based copy-pasting:
- Leader-F6 for Copying
- Leader-F7 for Pasting
You will need to go into “visual mode” in order to enact the copy command and you can paste into another terminal using normal mode.
Note for Copying from Browser to Terminal: Highlight what you are copying and paste by clicking the middle mouse button on the target.
Adding a wallpaper
You need the xwallpaper program to run a command to change the wallpaper:
sudo pacman -S xwallpaper
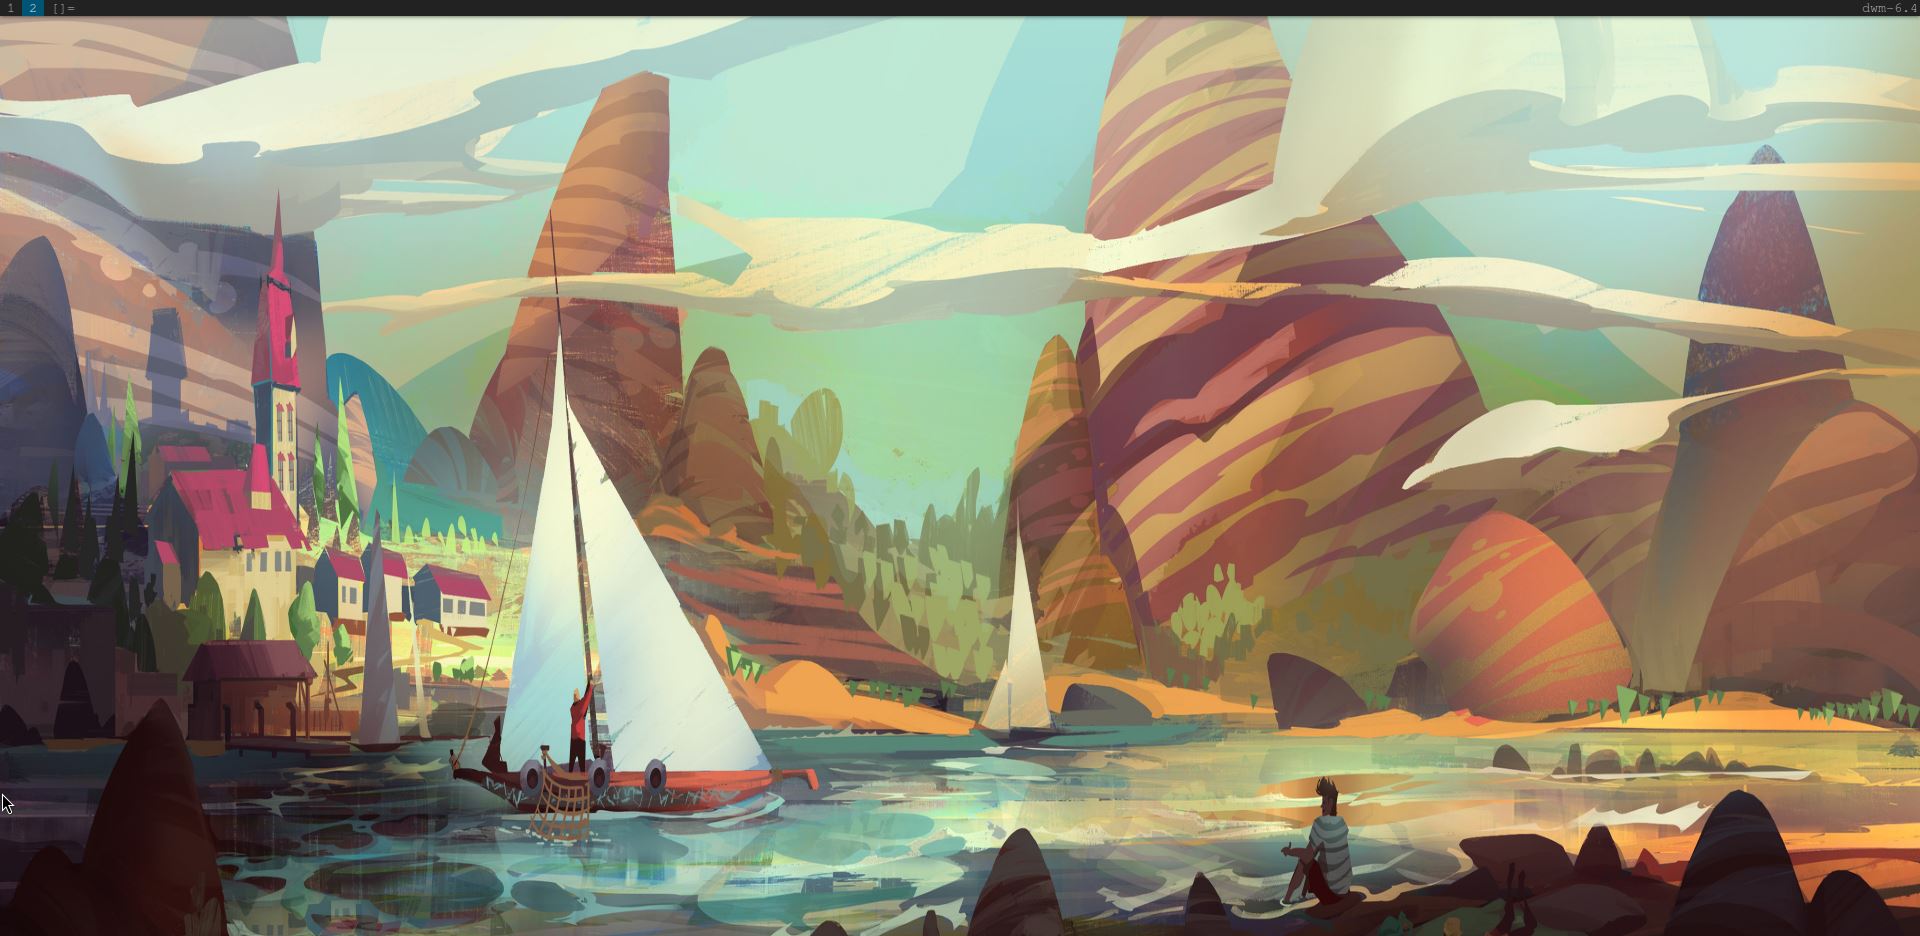
Add a line inside your ~/.xinitrc file to apply a chosen wallpaper every time your computer logs on:
xwallpaper --output Virtual-1 --stretch ~/desktop_setup/wallpaper/cartoon_cove.jpg
You would need to adjust the arguments to output to the correct display and path to your chosen image.
Conclusion
At this stage you should have a fairly rudimentary setup, however, it should get you acquainted with the various features Linux provides and how to approach the configuration in the future.
You should consider saving all your configurations onto a git repo so you can more easily manage your setups and deploy a desktop environment more easily in the future.
Ideally, you would want to run some of these procedures using shell scripts. Applying some automation will help in getting an environment setup more readily and consistently.
From this foundation, I recommend spending time experimenting with different programs to develop workflows that fit your specific needs.